Pricer 
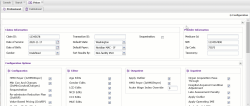
The Institutional and Professional claim pricer forms allow Claimshop users to validate claim grouping, pricing, and edits utilizing the power of Knowledge Source.
Procedure
-
Go to the CodeCheck menu.
-
Select Pricer. A tab opens with Professional and Institutional pricer sub-tabs.
Form Configuration
The Configuration feature lets you select or deselect criteria to include in or leave out of the validation process. There are two Configuration features: Pricer Configurations and Configuration Options. Both features contain the same set of criteria, but are utilized in different ways to benefit your workflow.
Pricer Configurations lets users set and save criteria preferences. The saved preferences persist until you change and resave them.
Procedure
- Click
 . The Pricer Configurations tab opens,
 - Select, deselect, or enter the desired criteria.
- Click Save.
Configurations Options lets you select or deselect criteria for real-time form validations. This allows for streamlined workflow as you make selections for the specific claim form you are working on.
Procedure
- Click
 to expand the Configurations Options panel.
 - Select/deselect or enter the desired criteria. When you submit the form, the criteria applies.
Validate and View Results
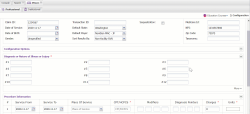
The Pricer forms allow you to manually enter claim demographics and provider details, as well as diagnosis and procedure information.
- In each section of the form, enter the data for the claim you want to validate.
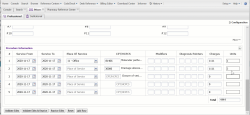
Note: Under Procedure Information, the default is five rows. If you need to add additional procedure details, click Add Row as many times as needed.
- Once all available data is entered, click one of the following validation options:
- Validate Edits
- Validate Edits & Reprice
- Reprice Edits
The Claimshop results display in the same tab. All sections on the results page are collapsible/expandible.
- (Optional) If you want to make changes to the form, or would like to utilize a different validation option, click Back to Form. You are navigated back to the form with all of your entered data present.
Note: To clear the form and start over, click Reset at the bottom of the form.
- View the Errors section for any found claim data errors.
- View the Invoice Details section for invoice details.
- The Line Details section gives you status for each claim charge item. If an item failed, view the Status and Status Message column for the reason. To better understand the reasons for failure:
- Click any hyperlinked code to navigate to the detail page.
- Click
 in the respective edit column to view details related to the particular edit.
Education Courses give users who have purchased an Education Bundle license to access related courses via the Knowledge Source interface!
Note: An additional license is required for access and not all Education courses are available in KnowlegeSource. The Pricer Education Courses require the Edu Payer Audit User role as well as access to the FinThrive Education Payer Audit courses.
Procedure
-
Click
 . The available courses are:
-
Payer Audit: Admitting Diagnosis
-
Payer Audit: Documentation Reviews
-
Payer Audit: CPT Procedures
-
Payer Audit: Diagnoses
-
Payer Audit: ICD-10-PCS Procedures
-
Payer Audit: Emergency Department Encounters
-
Payer Audit: Local Coverage Determination
-
Payer Audit: Medical Necessity
-
Payer Audit: Modifiers
-
Payer Audit: National Coverage Determination
-
Payer Audit: Two-Midnight Rule
-
-
Select a course. The system navigates you to the FinThrive Education interface.
Note: If you are not logged in to FinThrive Education, you are navigated to the login page. If you are logged in, you are navigated to the course page.
-
To launch the course, click the course name next to
 in the Lesson section. The course lesson page opens.
 -
Click Enter. The course opens in a new window.
![[[[Undefined variable Useful Phrases.PopUpTooltip]]]](../Images/pricer_forms_screenshot_thumb_250_0.png)


![[[[Undefined variable Useful Phrases.PopUpTooltip]]]](../Images/pricer_results_screenshot_thumb_250_0.png)
